Creating Users / Extensions
- Creating Users
- Provisioning the Windows Softphone
- Via Plug and Play
- By having the user login
- Importing / Syncing Users
- Importing/Syncing users from Microsoft 365
- Importing users from a CSV file
- Securing your User Accounts
- Configuring Google or Microsoft Single Sign-On
- 2FA - Two Factor Authentication
- Departments
- Access ‘Roles’
- See Also
Creating Users
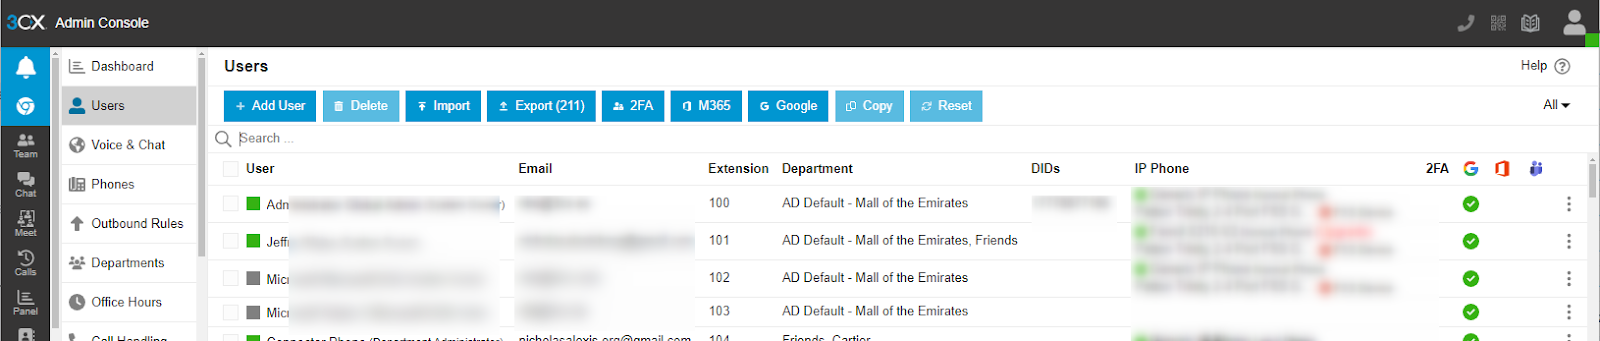
To setup your users in 3CX:
- Go to “Admin” > “Users”.
- Click on the “+ Add user” button.
- Specify the email and name.
- Select “ROLE” - this is important:
- Owner - this is what you are. You can do the kind of things you are doing now like creating users and see all calls!
- Manager - can add/remove users.
- User - can only manage their own account, they will not see the “Admin” pages. Furthermore, they can only see their own calls, not anybody else’s.
- Receptionist - can see and manage calls and live chat for everybody, but not configure the system.
- If you are setting up a dedicated 3CX system, you have additional security roles, such as “System Owner” and “System Administrator”. More about that below in the section “Access roles”.
- Main Group membership - Dedicated systems only. Ideally a user should be part of just one group. But if he/she is part of multiple groups, then the main group membership option appears. The office hours of this main group will be applied to that user.
- Assigned DID number - select a DID number you want to assign to this user.
- Click “Save” to create the new user. Continue creating all the members of your team.
- Your team members will get an email with account details.
- In the remaining tabs you can configure a user’s 3CX Talk link, Call Forwarding rules, Schedule, IP Phone, BLFs, Voicemail, View and Options.
Provisioning the Windows Softphone
Via Plug and Play
You can provision the Windows softphone for users on your locally installed PBX.
- Open the 3CX Windows Softphone. Make sure that no profile is present and/or active.
- Now - As an admin, open your V20 Web Client.
- Click on “Admin” > “Phones” > “PNP Phones”.
- Select the item shown as “Windows Softphone” > and click on the “Assign” button.
By having the user login

Alternatively the user can login with their webclient details:
- Specify the 3CX URL, i.e. mycompany.3cx.us
- Now Either use the 3CX username and password
- Or sign in using their Microsoft or Google Details if your instance is configured to allow this.
- In this case they need to click on SSO and then authenticate in their browser.
- The Windows softphone will automatically be provisioned.
Importing / Syncing Users
Importing/Syncing users from Microsoft 365
If you have Microsoft 365, you can import extensions and automatically sync users when you add or delete Microsoft 365 users. This requires a dedicated instance, more info in the Microsoft 365 integration guide.
Importing users from a CSV file
You can import a batch of extensions from a CSV file / Spreadsheet. To do this:
- Create a CSV file with the extensions formatted as follows:
Number,FirstName,LastName,EmailAddress,MobileNumber,OutboundCallerID,DID,Role,Department,ClickToCallId,ClickToCallAuth,WMApprove,MAC,Template,Model,Router,Language,Ringtone,QRingtone,VMEnable,VMLanguage,VMPlayMsgDateTime,VMPIN,VMEmailOptions,VMNoPin,VMPlayCallerID,RecordCalls,RecordExternal,RecordCanSee,RecordCanDelete,RecordStartStop,Disabled,HideFWrules,DisableExternalCalls,HideInPhonebook,CallScreening,PinProtected,PinTimeout,AllowLanOnly,SIPID,MS365SignInDisabled,MS365CalendarDisabled,MS365ContactsDisabled,MS365TeamsDisabled,GoogleSignInDisabled
1001,Name,Surname,email@,,,,"<rolename=""system_owners""/>",DEFAULT,namesurname,0,0,,,,,,,,1,43E89581-DAD8-B6F4-7660-15D48B5E6026,0,731826,1,1,0,0,,0,0,1,,0,0,0,0,0,,1,,,,,,
- Or use a spreadsheet or text file editor, download a sample here. If you want to import more extension features then you can see the full list of importable fields here.
Securing your User Accounts
Configuring Google or Microsoft Single Sign-On
If you have the 3CX FREE or 3CX SMB edition, then Google Single Sign-On has been automatically configured for you. You can login with your Google account.
If you have a dedicated install of 3CX, you can allow users to access 3CX using single sign-on from either Google or Microsoft. Here is how to configure single sign-on for Google or Microsoft.
2FA - Two Factor Authentication
You can enable 2 factor authentication on accounts. This will force users to enter an additional code besides their email and password. 3CX 2FA supports popular authenticators from:

Departments
Departments allow you to group extensions/users together so that you can apply the same language, time zone and office hours to them. In addition they serve as containers for access roles. That is to say, you can delegate rights to manage or see calls based on department membership.
All extensions are initially assigned to the “Default” group. An extension can be a part of multiple groups, but will follow the office hours of the "Main Group Membership" assigned. Read more about departments here.
Access ‘Roles’
3CX uses the concept of roles to define what a user can do and who can administer what. These rights will be limited to the departments he/she is a member of.
- User Role - The most basic role. Can see the presence of other users.
- Receptionist - This role is intended for a receptionist. It can override office hours and break times for the “Groups” they are a member of. They can also see group calls, presence and perform operations such as (divert, transfer, pickup, park and intercom).
- Group Administrator - A Group Administrator will have access to the “Admin” view. Group Administrators do not see reports or recordings and cannot Listen in or Barge in. A Group Administrator can configure Call handling, SIP Trunks, WhatsApp, Live chat that are part of the departments the group admin is a member of.
- Manager - This role can configure user settings such as Call Forwarding. He/she can create Users and elevate roles. They can see reports and recordings. In terms of presence and calls they can do everything the Receptionist can and also Listen in or Barge in.
- Owner - An Owner can do everything a Group Admin AND a Manager can do. It's meant for owners of companies or at least ‘owners of a department’. So Owners can also Barge in, Listen in or Whisper in addition to administering their group. An Owner can only elevate people to Manager or Group Administrator within his own group.
- System Administrator - Dedicated Instance only - A System Administrator can see everything for all the groups and all SIP trunks, even if they are not part of the group. System Administrators cannot Barge in or Listen in to calls. They also cannot make anybody else System Administrator or System Owner.
- System Owner - Dedicated Instance only - A System Owner can do everything a System Administrator can do AND Barge in, Listen in and view recordings and reports. Also, a System Owner is the only one who can elevate users to System Administration or System Owner (applies to dedicated instances only).
You can see a table with the exact rights each role has here.
See Also
- Mass Deploy 3CX PWA App for Terminal Server Users
- Work remotely with Android and iOS apps
- Android App: No new call notifications - PUSH Troubleshooting guide
- How to Configure Google SSO
- Microsoft 365 Integration
- Import Extensions in Bulk by CSV

